Showing posts with label designer series paper. Show all posts

March 9, 2025

Botanical Textures Suite Collection By Stampin' Up!

 Exploring the Many Textures of the Botanical Textures Suite Collection

One of the most exciting things about creating with Stampin’ Up! products is the ability to add dimension and texture to our projects, bringing them to life in a way that flat images just can’t. This week, I showcased the Botanical Textures Suite Collection, and let me tell you—it’s a texture lover’s dream!

A Feast for the Senses

The Botanical Textures Suite Collection is all about layers, depth, and contrast. Whether you’re a fan of subtle dimension or bold, tactile elements, this suite has something for you. Let’s dive into the key elements that make this collection a must-have for any crafter.

The Corrugated 3D Embossing Folder


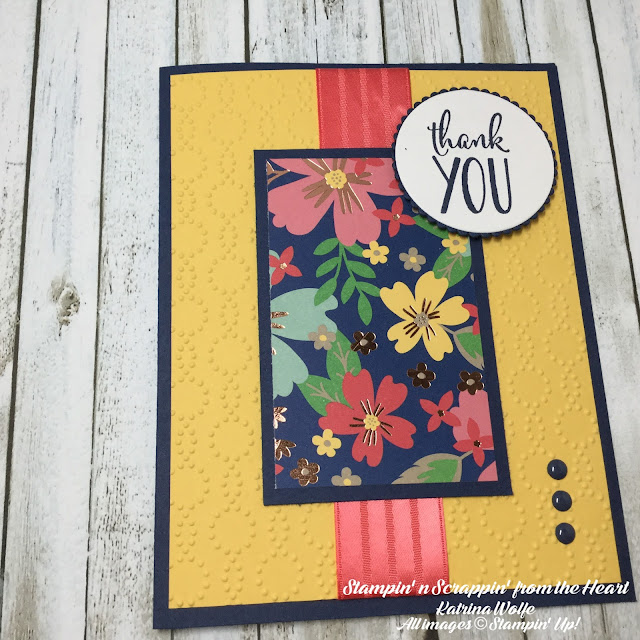
Texture starts with the right background, and the Corrugated 3D Embossing Folder delivers just that. This folder adds a deep, realistic corrugated texture that’s perfect for rustic and organic designs. Whether used on cardstock or specialty papers, it provides an instant “wow” factor with minimal effort. I especially love it on Kraft or Soft Suede cardstock for that authentic, earthy feel.

Woven Textures Designer Series Paper

Next up is the Woven Textures DSP, and this paper pack is packed with variety! You’ll find knitted patterns, woven wood textures, and geometric designs in warm, earthy tones. These backgrounds are stunning on their own but also pair beautifully with bold stamped images and die cuts. If you want to create the illusion of fabric or woven baskets in your paper crafting, this paper is your new best friend.


Botanical Textures Designer Series Paper

The Botanical Textures DSP brings in the beauty of nature with black-and-white botanical imagery layered with rich shades of Basic Gray. This paper is perfect for those who love to add their own pops of color. Use Blending Brushes, Stampin’ Blends, or watercolor techniques to bring these images to life while still keeping that bold, textural contrast. It’s a fantastic way to add drama to your projects!


Bringing It All Together

During my live, I shared a few ways to mix and match these textures for maximum impact. Here are a few takeaways:

  • Layering is key – Stack the Corrugated 3D Embossed cardstock with a Woven Textures DSP strip and top it off with a fussy-cut botanical element from the Botanical Textures DSP.

  • Play with contrast – Pair the structured lines of the corrugated texture with the soft, organic feel of the floral elements.

  • Add finishing touches – A little Linen Thread or wooden embellishments bring even more tactile charm to your creations.

The Botanical Textures Suite Collection is a crafter’s playground, filled with endless possibilities. Whether you’re drawn to rustic, modern, or vintage-inspired styles, this suite has the elements to bring your vision to life.

If you missed my live, be sure to check out the replay on my Facebook page or YouTube channel to see these textures in action! And don’t forget to grab your favorites from my Stampin’ Up! store before they’re gone!

Happy crafting!

Katrina

March 7, 2025

I’m Back! Let’s Get Creative Again!


Hello, crafty friends!

It’s been a while since I last shared here on the blog, but I’m excited to be back! Life has been busy (as it always is), but I’ve missed this space and connecting with you all through creativity. So, I’m making a fresh start—with a plan to post once a week to keep things consistent and manageable.

To keep things flowing, my weekly blog post will tie into my Sunday Facebook and YouTube Live sessions. That means each week, I’ll be diving deeper into the products, techniques, and inspiration I share during my live crafting sessions—giving you even more ways to bring creativity into your week.

This Sunday, I’m featuring the stunning Botanical Textures Suite Collection—a must-have for texture lovers! From the corrugated 3D embossing folder to the Woven Textures Designer Series Paper (with knit, wood, and geometric patterns in warm earth tones) and the Botanical Textures DSP (offering elegant black-and-white botanical imagery), this suite is packed with possibilities. I’ll be sharing project ideas, tips, and ways to mix and match these gorgeous textures.

I’d love to hear from you—what kind of content inspires you most? Let me know in the comments, and be sure to join me live this Sunday as we explore this suite together.

Happy stamping,
Katrina


July 24, 2018

Hello and Happy Tuesday! I hope you're all having a fantastic start to your week. I know I've been a bit crazed the last few days, planning and prepping for my monthly card class tomorrow while keeping up with hubby while he was off for a long 3 day weekend. I love him to pieces but boy, he makes it hard to get stuff done! Anyone else with that issue?

Anyhoo, I have a really cute project to share with you. It's an adorable mini gift bag created with 2 pieces of designer series paper, and if you want to see how I do it, join me this evening at 7 PM EST on my Facebook page for a FB Live where I will walk you step by step on how to create these adorable little gift bags. They are perfect for presenting a piece of jewelry, small embellishments and any other small gift. Seriously, they are just adorable.

What you need:
2 pieces of Designer Series Paper measuring (DSP) 6" x 6"
A strong adhesive (I recommend Tear n Tape)
A scoring tool (either the Stampin' Trimmer with scoring blade or the Stampin' Score Tool)

Score both pieces of DSP at 1.5"; 1.5"; 1.5"; and 0.75" so that is 3 sides at 1.5" and 1 side 0.75". Fold on all of the score lines and adhere the 0.75" score line down so that you see the contrasting side of the paper. Then, using your paper snips, cut up on the score lines below the folded edge up to the parallel score line; add adhesive to the tabs you created and adhere to the inside of the larger tab, this will create the bag bottom. Now repeat for the second piece of DSP. Add adhesive to the outside of the sides on one of the 1/2 bags you've created. Slip this one inside the other and adhere the 2 parts together, creating a bag. Then decorate as you wish. In this case, I added a button and Linen Thread with a mini Glue Dot.

That completes our project for today, but remember, if you would like to watch me demo this project, stop by my Facebook page for the Live Demo with me, Katrina from Katrina's Kreative Heart at www.facebook.com/katrinaskreativeheart

Happy Stamping,


March 22, 2018

Fun Folds and Pandas

Hello and Happy Thursday! Today I have a happy card to share with you. I got my fun fold idea from fellow demonstrator Rachel from Stamp Your Art Out. She actually came up with the measurements and folds for this card. I just took it and used my own stamp and designer series paper. And it came out just too cute if I may say so myself. But HUGE kudos to Rachel for coming up with this really fun fold card design. I love it and it's so easy to do. She's a genius!
Anyway, lets get started. I began with a half sheet of cardstock 4.25" x 11" and scored it at 2.75"; 4.25"; 7.25" and 8.5"; then accordion fold - see the video;
Cut a piece of Whisper White cardstock 4" x 2.25" for the bottom "layer". You are going to assemble this card from the bottom to top. I stamped "Happy Birthday" sentiment in Basic Gray ink and added "confetti" using Bermuda Bay ink along the left edge. Adhere this to the bottom layer. Then cut 2 pieces of designer series paper 4" x 4" (I used the reverse side of one piece from the Bubble and Fizz Sale-a-bration paper and they complimented perfectly) and adhere one of the pieces to the center layer, making sure to line it up so that you are covering the Whisper White layer below. Then cut a second piece of Whisper White 4" x 1.25" and stamp "Love You" in the Basic Gray archival ink and add "confetti" on either side of the sentiment with Bermuda Bay ink and adhere to the center of the DSP, taking care to ensure it's high enough to be covered by the last piece of DSP added to the top of the card when closed.
Next, add the last 4" x 4" piece of DSP to the top layer. Stamp the Panda in Basic Gray Archival ink, add the "Hi" to his envelope and cut him out using a stitched oval from the Stitched Shapes Framelit collection and layer it onto a scalloped oval cut from Bermuda Bay cardstock using the Layering Ovals collection. For a final touch, I added a Whisper White Bakers Twine bow just under his little feet with a Mini Glue Dot.
I hope you enjoyed this card as much as I did. I had a lot of fun putting this together.These little panda's just make me smile anyway, add all the happy colors from the DSP and you have a win win card all the way around and the fun fold just makes it that much more HAPPY! And who couldn't use a little more happy in their life? If you would love to make this card, below is a list of supplies I used. The Party Pandas and the designer series paper are Sale-a-bration products....the only way to get these is free with a qualifying purchase. These are both level one options so for a $50 purchase you can select one of these awesome options...for $100, you can select both! Sale-a-bration ends in just 9 days, so don't wait too long because after 3/31 all these awesome Sale-a-bration goodies go away forever....and that's a sad thing. Should you choose to shop with me, be sure to use the host code over there on the right side of your screen, because everyone that uses this code this month will receive an EXTRA free gift from me!
Until next time, Happy Stamping!
Katrina


Product List

July 23, 2016

An Elegant Thank You

Happy Saturday! I hope you are enjoying what looks to be a perfect weekend? Blue skies abound here! Anyway, today, I wanted to share with you a thank you card I created. I actually created this one for the sketch challenge taking place on my Facebook page. Yes, you should check it out and come join us, we have LOTS of fun. Anyway, I was really happy the way it turned out and wanted to share this with you. One of the reason's I love this card so much is that it really show cases just how gorgeous the Affectionately Yours Designer Series paper is, for real. The one that I used has the copper flowers scattered among all the other beautiful colors and it just sparkles! I am really loving the copper trend this season.
So, what do you think? Ok, here's how I did it. I started with a Night of Navy card base, 8 1/2"x 5 1/2" and scored it at 4 1/4" for a standard A2 size card. then I cut a piece of Daffodil Delight at 4" x 5 1/4" and ran it through the Big Shot with the Elegant Dot's TIEF to give it some texture. I then wrapped a piece of retired (insert sad face) Watermelon Wonder ribbon through the center and adhered it in the back with some scotch tape then adhered the entire panel to the card front with Fast Fuse. I then cute a piece of this GORGEOUS Affectionately Yours DSP 2" x 3" and matted it onto another piece of Night of Navy cut 2 1/4" x 3 1/4" and added that to the card over the top of the ribbon. I just used my Fast Fuse (I love this stuff!) I then stamped Thank You from the Happy Happenings stamp set in Night of Navy ink onto a scrap piece of Whisper White and cut it out using my Layering Circles Framelits and matted that onto a scalloped Night of Navy circle, also cut using the Layering Circles Framelits, and then added that to the top right corner of the DSP using Stampin' Dimensionals. Then just to add a little sumthin' sumthin', I added 3 little enamel shapes from the Regals package (Night of Navy)
And that my friends, completes the card! The picture just doesn't do the DSP any justice at all. This is one you have to see up close and personal in order to appreciate just how beautiful it really is. I do also want to remind everyone of the Bonus Days taking place for the month of July. If you place a $30 order with me using Hostess Code: FT9YEUVC, I will send you the materials for my Christmas in July Class along with the PDF instructions and access to an exclusive video to follow along. The kit provides enough material to create a total of 9 cards, 3 each of 3 designs. And, Stampin' Up! is giving away a $5 coupon code for every $50 spent for you to use on ANY purchase in August! And there are no limits on how many $5 coupon codes you can collect! Just don't lose them. Print them, write them down and save the emailed code. You do not want to lose them....they're quite valuable! (wink) So, visit my store today and and begin earning great things! (All kits will be mailed out by 8/5/16 for anyone that places a $30 or more order)
Happy Stamping!
Katrina


01 09 10 Code line 7 9 is for loading jQuery library. Remove this line if you’ve already loaded it somewhere else in your blog. Hint: If your blog has an image slider, carousel or something with fading effect running, chances are it is powered by jQuery. If this widget doesn’t work, the first thing you want to do is comment out or remove this line. To use your own button, replace the URL in line 3 with the direct link URL to the image. Make sure to keep the quotes. To reposition the button, replace