October 27, 2016

The Christmas Mouse

Hello again! Well, it's cold and blustery here today with our first snow fall of the season. I'm thankful it's not sticking yet, I need new tires for my Jeep and can't get them until tomorrow. Once that happens, what ever happens, happens.
Anyhoo, I have a card I want to share with you that I made using the Merry Mice stamp set and water colored using Wink of Stella rather than water! I know! Crazy, right? But it worked and it's so sparkly! I just love it!

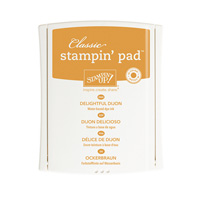
The close up shot shows the sparkle a little more. It still doesn't do this card any justice. I started with a standard card base of Emerald Envy and layered a piece of Presents and Pinecones DSP cut at 3 3/4" x 5" and 2 pieces of Cherry Cobbler cardstock cut 3" square. I stamped the image onto Watercolor paper (I used my MISTI to stamp the image 3 times to get a nice dark crisp image) using Basic Black Archival ink, and I stamped the sentiment with the same. I then colored the image using the clear Wink of Stella glitter pen using Cherry Cobbler, Emerald Envy, Mint Macaron, Delightful Dijon, his nose is Basic Grey, inside ears, Pink Pirouette, and his body is Smoky Slate. The star and the gold parts of the ornament are done in gold Wink of Stella.
I hope you enjoyed today's card. Please leave a comment below, I would love to here what you think.
Happy Stamping,


Product List

October 25, 2016

Wondrous Wreath

Good Morning and Happy Tuesday! Today I am excited to share a card with you that was made by one of my a follower of my FB page, Nancy Woeltje using the Wondrous Wreath stamp set. She created this card for our weekly sketch challenge and she knocked it out of the park on this one. Don't you agree?

She also used the brand new Cable Knit Sweater Dynamic Embossing Folder. I just love the texture that gives to cards. For a list of supplies that Nancy used on this card, please see below. For measurements, feel free to head on over to my FB page and check out this weeks Sketch Challenge at www.facebook.com/snsfromtheheart and while you're there, join in on the fun. We would love to see what you come up with! Until next time, happy stamping!

Product List

October 20, 2016

Lovin' the Tin of Tags

Hello and Happy Thursday! Today I want to share with you a cute Christmas card I made using the stamp set, Tin of Tags and the Candy Cane Lane DSP. I love this stuff too!
The card base is a standard A2 card from Real Red Cardstock, I then cut a piece of DSP 4 1/2" x 1 3/4" and a second piece, flipped over cut at 3 1/4" x 2". The strip of Basic Black is cut 1/2" X  4" and the Whisper White is cut 2" x 1 3/4". I stamped the sentiment in Real Red ink and adhered all the pieces down with Snail adhesive. I then added 3 pearls to add a little something to it. I would love to hear from you as to your thoughts on this card, so please feel free to comment below. Until next time, Happy Stamping,
 

Product List

October 18, 2016

Blessed Beyond Measure

Hi there,
Today's card is one I did for a sketch challenge over on my FB page. I know, most of my cards are born due to the challenge, but this one I especially love because in addition to the wonderful rich colors in this card, I LOVE the sentiment, which comes from the Paisley's and Posies Stamp set, and the reason I love it so, is that it truly reflects how I feel, and that is blessed beyond measure. I am thankful for each and every day. I am thankful and grateful for my family, I have been blessed to have the very best parents in the world, a wonderful mother-in-law, a generous brother and awesome sister and brothers- in- laws. And to top it all off, I am able to work my Stampin' Up! business in way that works for me! Yes, I have my full time job as a RN Clinical Informatics nurse that I love as well, but Stampin' Up! has provided me an opportunity to share my passion with others and build friendships around a hobby that I love, with like minded people who also enjoy the paper crafting world.
I would love for you to join me in this journey. All you need to do is decide you want to have fun, click the join now above, pick $125 in merchandise for you starter kit (shipping is free) and pay only $99! It truly is the best value around. Then you get to run your business YOUR way. You decide if you want to hold classes? You decide if you want to sell product or just buy your own at a discount; in addition, you get access to a private FB group that is just for our team, the Inky Fingers Warm Hearts. Again, it's up to you on how you run YOUR business. If you have any questions, please just ask. I am here for you!
Here is my card for today let me know your thoughts!

October 13, 2016

Jar of Haunts

Good Morning and happy Thursday! Today's share is from the Jar of Haunts Halloween stamp set. I love this set! It's so adorable, especially this "mummy" jar! So stinkin' cute! I'm excited to share this card in my card class this evening!
The card base is Basic Black cut 8 1/2" x 5 1/2' and folded in half. The Pumpkin Pie layer is 3 3/4" square, the DSP strip is 5 1/2" x 3/4" and the Whisper White layer is 3" square. I stamped the "mummy" jar and the Happy Halloween using Memento Tuxedo Black ink. Then, using the blender pens and Basic Grey ink, I went around the edges of all the "mummy" wrap to add shading and highlighting to him. I just love how cute this card came out. And the more I look at him, the more I believe he could also be used for a Get Well card! What are your thoughts? Let me know in the comments below. If you would like to re-create this card, all of the materials used can be found in my online store by clicking on the "shop" link in the navigation bar. Feel free to look around and I wish you all a wonderful day.
Happy Stamping,
 

Product List

01 09 10 Code line 7 9 is for loading jQuery library. Remove this line if you’ve already loaded it somewhere else in your blog. Hint: If your blog has an image slider, carousel or something with fading effect running, chances are it is powered by jQuery. If this widget doesn’t work, the first thing you want to do is comment out or remove this line. To use your own button, replace the URL in line 3 with the direct link URL to the image. Make sure to keep the quotes. To reposition the button, replace