Showing posts with label Stampin Up card ideas. Show all posts

September 21, 2026

Three Easy Tile Garden Cards Plus a Clever Die Cutting Trick

 Pretty paper can make cardmaking easier

Have you ever pulled out a beautiful pack of Designer Series Paper, admired every pattern—and then felt stuck because you did not want to cut it wrong? This week’s Tile Garden cards are a good reminder that you do not need a complicated plan. Start with colors and patterns you love, add one useful technique, and let the paper carry much of the design work.

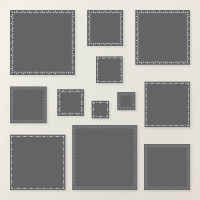
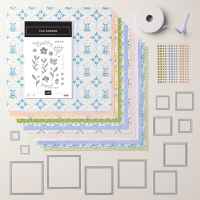
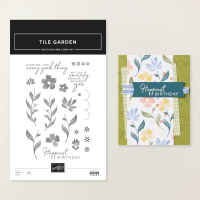
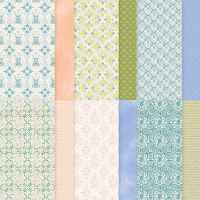
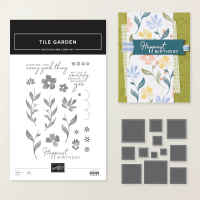
I used the Tile Garden Stamp Set, coordinating dies and Mosaic Garden Designer Series Paper to create three cards that are simple enough for a newer stamper but still have the details experienced cardmakers enjoy. We made a diagonal birthday card, an easy book fold and a clean offset-panel card.

Cut two patterns once and make two card fronts

The Happiest Birthday card begins with two pieces of Designer Series Paper cut to the same size. Stack them together and make one diagonal cut through both layers. Then swap the bottom sections. Just like that, you have two coordinated paper combinations ready for two cards.

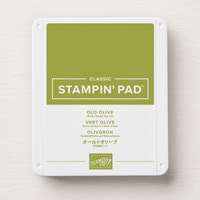
A narrow strip of Old Olive cardstock hides the seam and makes the angle look intentional. This is one of my favorite kinds of cardmaking shortcuts: it saves time, stretches your paper and gives you a second card front before you have even finished the first. Save the extra pieces in a clear envelope or right inside the paper package so they do not disappear into the scrap pile.

Turn a square die into a rectangle

The book-fold card includes the technique I was most excited to share. Although the Tile Garden dies are square, you can extend one to create a longer rectangular focal panel.

Place the die on a longer piece of Basic White cardstock and secure it with low-tack tape. Run it through the die-cutting machine with one cutting edge hanging outside the plates so that edge remains uncut. Then slide the die down, carefully nest the decorative openings into the cuts you already made, and run the opposite end through with the finished edge outside the plates.

The result is a custom rectangle with the same pretty border. The key is to use low-tack tape, line up the existing cuts carefully and keep the edge you do not want to cut outside the plate sandwich.

Try an easy book fold

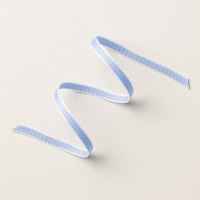
A book fold looks special, but it is one of the easiest fun folds to make. Score a standard 8 1/2 x 5 1/2 inch card base at 4 1/4 inches and again at 3 inches. Fold the narrow section back, wrap ribbon around it, and glue that section closed. You still have a standard-size card, but the narrow spine adds interest and gives your ribbon a natural place to sit.

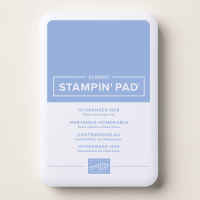
On this Hydrangea Hue version, the Mosaic Garden paper fills the main panel while the lengthened floral label and smaller sentiment tile add layers without making the design feel crowded.

Let one simple layer do the work

The Wishing You Every Good Thing card may be the simplest of the three. Instead of covering the whole front, I layered a 2 3/4 x 5 inch piece of patterned paper on Crisp Cantaloupe cardstock and placed it toward the left side of a Basic White card base. That offset placement creates plenty of visual interest before the stamped focal panel is added.

When a card feels unfinished, you may not need more products. Try moving a layer away from the center, overlapping the focal piece across two areas, or repeating one color in a few small accent dots. Those tiny choices help the design feel balanced.


Which idea will you try first

These three cards prove that beginner-friendly does not have to mean boring. A diagonal cut stretches your Designer Series Paper, a partial die-cutting technique gives your dies more mileage, and an easy book fold makes a standard card feel special.

Which idea would you try first: the two-for-one diagonal cut, the book fold, or turning a square die into a rectangle? Leave me a comment, save this post for your next crafting day, and join my mailing list for the printable tutorials and future class news.

Product List
February 2, 2026

🌸 Sweet Bugs Bundle: 3 Adorable & Easy Cards You’ll Love

 If you’ve been craving something cute, cheerful, and easy, this week’s projects are going to hit the spot.

Between winter weather that just won’t quit and the itch to start thinking spring, I was more than ready to play with the Sweet Bugs Bundle from Stampin’ Up!—and let me tell you, this suite did most of the work for us.

These three cards are quick to make, beginner-friendly, and full of charming little details that make you smile without requiring complicated techniques. If you love letting Designer Series Paper shine (and who doesn’t?), you’re going to love these.


🐞 Why the Sweet Bugs Bundle Is a Total Win

This suite is adorable without being over-the-top, and it’s incredibly versatile. You get:

  • A playful stamp set with sweet sentiments

  • Coordinating dies that cut out stamped images and Designer Series Paper elements

  • Cute-as-can-be Ladybug Epoxy Shapes

  • Old Olive rickrack ribbon for texture

  • And that Cute as a Bug 12" x 12" Designer Series Paper—the real MVP

The paper alone creates instant scenes, which means less work for you and more time enjoying the process.


✂️ Card #1: Hello Friend (Simple with a Twist)


This card is proof that one angled piece of DSP can completely change a layout.
  • Thick Basic White card base

  • Angled Designer Series Paper panel

  • Old Olive rickrack ribbon to soften the seam

  • A simple “Hello Friend” sentiment

  • A fussy-cut ladybug straight from the DSP

It’s clean, quick, and perfect when you need a card now but still want it to feel special.

Tip: Cutting your DSP at an angle—without overthinking measurements—adds instant interest.


🌿 Card #2: Hello with a Whimsical Scene


This one might be my favorite (don’t tell the others).

Using the pre-printed scene panels from the DSP, you can build a little woodland moment in minutes:

  • Layered 3" x 4" panels for the background

  • Dimensionals to pop up the scene

  • Sweet stamped and colored bugs

  • Tiny epoxy ladybugs scattered for movement

This is a great example of letting paper do 90% of the work and then adding just a few stamped elements to bring it to life.


🐜 Card #3: Spread Joy (Playful & Dimensional)


This card leans fully into the whimsy—and I love it.
  • Layered Old Olive and DSP panels

  • Lily of the Valley stamped and softly colored

  • A marching line of ants (how cute is that?)

  • A bee watering the garden

  • A stitched “Spread Joy” sentiment popped up with dimension

It’s playful, dimensional, and still very achievable—even if detailed cards usually intimidate you.


💡 Why These Cards Work So Well

  • No complicated folds

  • Minimal coloring

  • Great layouts to mass-produce

  • Easy to adapt for different sentiments or occasions

If you’re easing back into crafting or just want something joyful and stress-free, this is a fantastic suite to have on your desk.


🌼 Want to Make These with Me?

All the measurements, supplies, and step-by-step instructions are available in this week’s tutorial. And if you love learning by watching, be sure to catch the replay of my Sunday Live where I walk through each card.

Have a favorite card from this set? I’d love to know—drop a comment below or save this post for later inspiration!

09 10 Code line 7 9 is for loading jQuery library. Remove this line if you’ve already loaded it somewhere else in your blog. Hint: If your blog has an image slider, carousel or something with fading effect running, chances are it is powered by jQuery. If this widget doesn’t work, the first thing you want to do is comment out or remove this line. To use your own button, replace the URL in line 3 with the direct link URL to the image. Make sure to keep the quotes. To reposition the button, replace