Showing posts with label quick and simple. Show all posts

September 1, 2022

Perfect Partners Blog Hop - Apple Harvest Watercolor

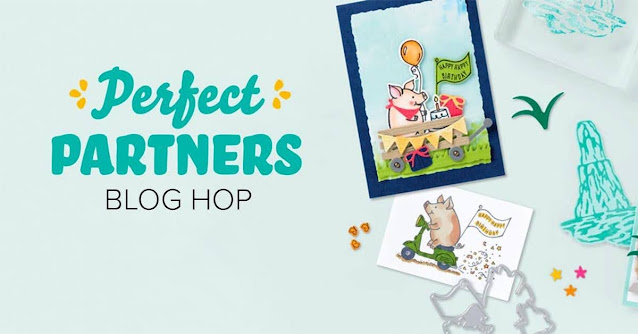
Perfect Partners Blog Hop

 Hello and welcome to the Crafty Collaborative Blog Hop. Today our theme is the new release, Perfect Partners! Oh my gosh, Stampin' Up! released coordinating dies for some of our most adorable stamp sets found in both the Annual and July to December Mini catalogs.

Currently, you are visiting my blog, Katrina's Kreative Heart, with me, Katrina Wolfe. Below, you will find  the full line up with links to each of the blogs in the hop. Use these links to move from blog to blog so you won't miss any of the amazing projects and inspiration. 

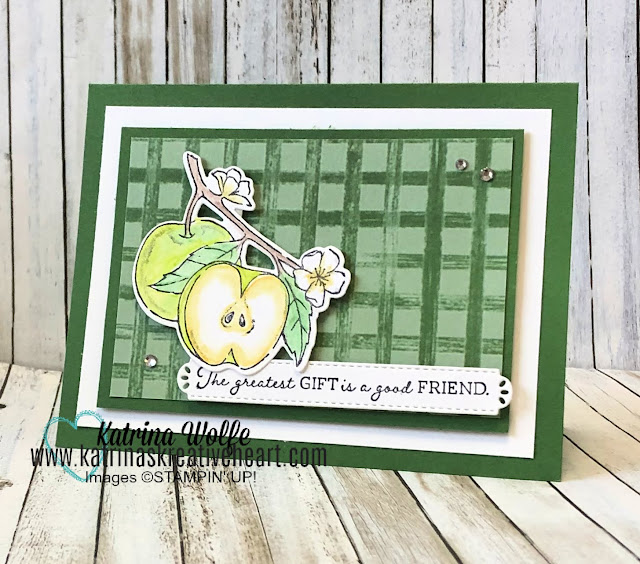
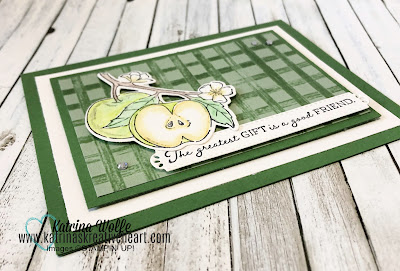
Today, I am featuring the Apple Harvest set using my beloved Watercolor Pencils! . 
Apple Harvest Watercolor pencils

I don't know about you, but I absolutely love to color with my Watercolor Pencils and my Blender Pens. I feel like I get the perfect blend from pairing those two coloring tools together. Do you use your watercolor pencils? Leave me a comment, I'd love to know your favorite way to use them? 
Watercolor pencils apple harvest


Download the Perfect Partners Flyer HERE


Thanks so much for stopping by, remember, use the links below to follow along to more great inspiration.


Product List

Blender Pens
[102845]
$12.00

August 20, 2019

A Quick & Simple Fun Fold Featuring You Always Deliver

Hello and Happy Tuesday! Today, I have another quick and simple project for you. It's a fun fold card, but it's so quick and simple you'll be able to knock off a bunch of these in no time at all. Today, I am featuring my product pick for the week, the You Always Deliver stamp stamp set by Stampin' Up!. I think this little mailman/UPS guy/FedEx guy is just too cute for words!
A Quick & Simple Fun Fold Featuring You Always Deliver
Seriously, he can be whatever delivery person you want him to be, just change up your coloring scheme and voila...he's a postman or FedEx delivery guy! Today I went with the monochromatic look with just a pop of the Pretty Peacock and Real Red. I'm pretty happy with the results. 
A Quick & Simple Fun Fold Featuring You Always Deliver

For a complete list of supplies with links to my online store, see below. I also have a downloadable PDF with all of the measurements, just use the link below. 

Happy Stamping,


Product List

August 19, 2019

Simple Open Top Gift Box featuring You Always Deliver by Stampin' Up!

Hello and Happy Monday my friends! The week is off and running already that's for sure! I hope you all had a great weekend and your week ahead is a great one.
Today I have a fun little gift box to share with you. It really is a simple open top gift box that is so useful for so many small gifts. I used it to present a package of the Walmart, Better Homes and Gardens Wax Melts. It is also perfect for gifting a roll of ribbon or many other crafty supplies! Today, I'm featuring this cute little gift box with the You Always Deliver stamp set by Stampin' Up!
Simple Open Top Gift Box featuring You Always Deliver by Stampin' Up!

I am totally in love with the Pretty Peacock/Crumb Cake color combo. I can not get enough of it. I find it so striking.
Anyway, I have a downloadable/printable PDF below with all of the measurements and the list of supplies.
Simple Open Top Gift Box featuring You Always Deliver by Stampin' Up!

Have a great day and I will see you tomorrow!
Happy Stamping,


Product List

June 14, 2018

Blueberry Bushel and Lemon Lime Twist meet Varied Vases

Hello and Happy Thursday! Well, it's another one of THOSE weeks. Our hospital is currently undergoing accreditation and the stress levels have been running HIGH...OH MY! And it's been a really long week..and to top it all off, we get to make another attempt at heading to Mobile, Al Monday....I'm hoping this is "3rd time's a charm" otherwise, I hope it's "3 strikes and you're out" because this is just crazy.....I have actually attempted to write this post every day since Tuesday!
Anyway, onto the fun stuff! I am so in love with the Varied Vases bundle. It is one of those stamp sets that makes creating a beautiful card almost mindless! What I mean by that is there is little to no effort required to make a beautiful card with this set. Grab a few awesome colors that you love, some paper and go to town. The designs are endless and everyone turns out amazing...like I said, NO EFFORT! Now who wouldn't want that?

Instructions:

Ok, now here are all the deets for re-creating this card:

Measurements:

Lemon Lime Twist: 8.5" x 5.5" scored and folded at 4.25"; 5.25" x 4"; 4.5" x 1 3/8";  3.5" x 2.25"
Blueberry Bushel: 5 3/8" x 4 1/8";  4 3/4" x 1 5/8"; 4 3/8" x 1 1/4"; 3 5/8" x 2 3/8"; 2" x 2"
Whisper White: 1 7/8" x 1 7/8"
2018-2020 In Color DSP 6" x 6" Paper Pack: scrap

Run the 5.25" x 4" layer of Lemon Lime Twist through the Big Shot with the Polka Dot embossing folder and adhere the layers together. Stamp the sentiment from the Varied Vases stamp set in Blueberry Bushel ink and layer it onto the card front with Stampin' Dimensionals. Punch out the vase using the coordinating Vase Builder punch from a scrap piece of the DSP and stamp the flowers onto the Whisper White square and to color the flower heads, stamp off once with Blueberry Bushel and add a couple of leaves with the Lemon Lime Twist ink. Pop the vase up on Mini Stampin' Dimensionals and add a double bow from Whisper White Bakers Twine and add the the vase with a Glue Dot.

I hope you enjoyed today's card and would love to hear your comments, so please feel free to leave a comment below. If you enjoy tutorials such as this and would like to get them direct to your inbox, join my mailing list here.
Have a great evening and happy Stamping!


Product List
01 09 10 Code line 7 9 is for loading jQuery library. Remove this line if you’ve already loaded it somewhere else in your blog. Hint: If your blog has an image slider, carousel or something with fading effect running, chances are it is powered by jQuery. If this widget doesn’t work, the first thing you want to do is comment out or remove this line. To use your own button, replace the URL in line 3 with the direct link URL to the image. Make sure to keep the quotes. To reposition the button, replace