July 9, 2016

Falling Flowers

Happy Saturday everyone! Well today marks day 1 of my 10 day stay-cation! I have lots of crafting plans for this time here at home, but first, I must find the top of the craft table! What a chore! Anyhow, before I share today's project, I want to fill you in on a special deal from Stampin' Up! For the month of July, for every $50 you spend, you will be given a coupon for $5 toward ANY purchase in August! You must have a valid email account in order to participate, as they will email your coupon code to you. You must not lose that code as they are not maintaining records of these codes and they are not supplying demonstrators a list of mailed codes. They are leaving that up to you....but there is NO limit on the number of coupon codes you can earn! Those could really add up! And to sweeten the pot, for anyone that places an order using the Hostess code: FT9YEUVC for at least $75 before shipping and tax, I will send you a package of the brand new Metallic Enamel Shapes as a special gift from me, that is in addition to your coupon code from SU! This code will remain in effect until July 31st.
Ok, so on to today's project!
See the supply list below
Instructions:
Cut Melon Mambo 8 1/2" x 5 1/2" scored at4 1/4" for the card base.
Blushing Bride cut 3 3/4" x 5" and embossed with the Elegant Dots TIEF and adhere to the card base
Cut Very Vanilla with the largest Oval Framelit from the Layering Ovals Collection and stamp the flourish from the Falling Flowers stamp set in Melon Mambo ink and adhere to front of card.
Cut a piece of Pink Pirouette 2 1/2" x 3/4" and stamp Congratulations from the Flourishing Phrases stamp set in Memento Tuxedo Black ink and adhere to the front of the card. Finally stamp the flower from Falling Flowers in Melon Mambo ink onto a scrap piece of Blushing Bride cardstock and cut with the coordinating framelit and adhere to the front of the card with Stampin' Dimensionals and finally add pearls to the center of the flower and to the pods in the Flourish.
Happy Stamping!


July 5, 2016

Bonus Days Ahead!


Hello everyone! I truly hope that you all had a wonderful 4th of July holiday for those of you here in the States, enjoying all that BBQ! Yum! We had a great time at my sister-in-laws. Every time I see my great nephews and great niece, I’m blown away by how much they grow while I’m not looking. Ugh, time stands still for no-one! Which brings me to my point here, I have a very time sensitive 
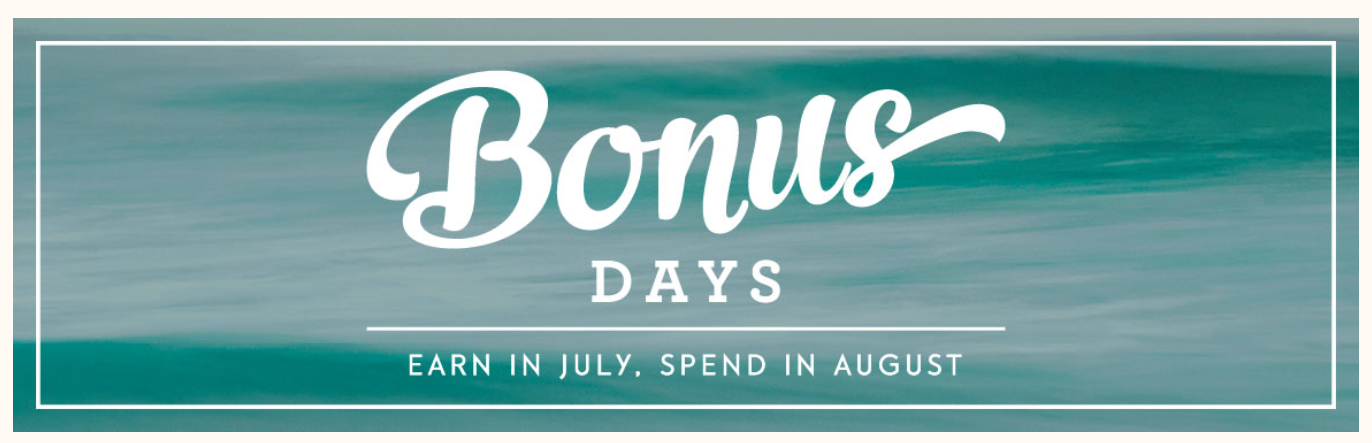
promotion to bring to you! Bonus Days! It all starts Thursday the 7th of July! You actually earn a $5 coupon for every $50 you spend that you will be able to redeem in August toward ANYTHING you want! How cool is that?

See below for the details and don’t miss out on this great opportunity! You could earn LOTS of coupons which translates into LOTS of discounted goodies in August!
Use Hostess Code: FT9YEUVC and spend $75 to get a free package of the Metallic Enamel Shapes from the new catalog in addition to your $5 coupon code!


Details

·         An email address is required to participate in this promotion; Bonus Days coupon codes can only be delivered to participants via email.

·         We strongly recommend that participants both save emails containing their Bonus Days coupon codes AND write down the coupon codes in a safe place—the codes cannot be resent if the participant loses the email, and Demonstrator Support cannot recover lost codes.

·         Participants will receive a $5 USD/$6 CAD Bonus Days coupon code via email for every $50 USD/$60 CAD they spend in a single order (catalog price before shipping and tax). There is no limit to the number of coupons participants can receive per order or throughout the duration of the promotion. There is no limit on the number of coupons participants can use on an order during redemption.

·         Bonus Days coupons codes can be used in the checkout process during the redemption period.

·         Bonus Days coupon codes can be redeemed for any product, excluding Starter Kits and Paper Pumpkin subscriptions. New prepaid Paper Pumpkin codes can be redeemed.

Dates

·         Promotion period: July 7–31, 2016

·         Promotion Deadlines:

o    Phone/Fax/Mail: July 29, 2016 by 6:50 PM (MT)

o    OEX/Online: July 31, 2016 by 11:50 PM (MT)


·         Redemption period: August 2–31, 2016

·         Redemption Deadlines:

o    Phone/Fax/Mail: August 31, 2016 by 6:50 PM (MT)

o    OEX/Online: August 31, 2016 by 11:50 PM (MT)

 Happy Stamping,

July 2, 2016

Celebrating Our Freedom

Hello everyone! Today I wanted to share a card I put together a little bit ago but thought it was perfect for this weekend as we celebrate Independence Day here in the States. It happens to be a thank you card which adds to it being a perfect card as it is because of the brave men and women of our armed forces that make it possible for us to celebrate such an occasion. 
 
This card was created using stamps from the Work of Art stamp set, Real Red ink and cardstock, Night of Navy ink and cardstock along with Whisper White cardstock. The "stars" are from some flower shaped rhinestones I had picked up in Michaels years ago and had on hand. This was a simple card to make and I hope it inspires you to make your own patriotic cards that can be shared with those responsible for our freedom. I wish you all a very happy 4th of July.
Happy Stamping,
Katrina

June 30, 2016

Throwback Thursday - Too Cute for Words!


Hi there! Happy Thursday! I hope you’re all enjoying your summer so far. I’m just keeping busy, busy, busy! Today, I want to share with you a little of a “Throwback Thursday” project. It’s a mix of new and retired product, but so cute! You see, I was asked to create a cute invitation for my God-daughters up coming baby shower. I know right, how could I possibly be old enough to have a God-daughter that’s old enough to have a baby? To answer that, I’m not sure, but apparently time flew by while I wasn’t looking and my God baby grew up and is almost 22 years old! Anyhoo, here it is:


Supplies:

                Stamps: Sweet Li’l One – Retired

                                Something For Baby

                                Date Time Place – Retired

                Ink:         Blushing Bride

                                Basic Black Archival

                Tools:    Big Shot

                                Baby’s First Framelits

                                Fast Fuse Adhesive

                Accessories: Doilies

                                         Medium Whisper White Envelopes


I hope you enjoyed seeing a mix of current and retired product come together to create an adorable invitation for someone very special to me. If you have any questions regarding this project, please feel free to reach out to me in the comments below. I look forward to hearing your thoughts!

Happy Stamping,

Katrina

June 28, 2016

A Simple Note

Hello there! I hope you're all doing well! I have to say, I had an extremely productive weekend in my craft room! Hubby headed off to Canada on a fishing trip which left me to my own devices! Well, of course that meant crafty time for me! Which leads me to today's share! This happens to be another of my absolute favorite bundles in the new catalog. It's called Flourishing Phrases and it is absolutely beautiful and it's quite versatile having many sentiments to choose from in addition to the floral and leaf patterns and the bold flourish. I just love love love it! Did I mention that I love it? Seriously, this is a set to add to your must have collection.
Well here it is, this design was strongly influenced by Ronda Wade #creativeconventiononline


Supplies:
Cardstock: Basic Black
                  Whisper White
                  Flirty Flamingo 
Ink:  Flirty Flamingo 
        Basic Black Archival
Tools/ Stamps: Flourishing Phrases Bundle
           Big Shot
           Blender Pens
           Thick White Bakers Twine
         2016-2018 Enamel Shapes
         Fast Fuse
         Glue Dots

So, what is your favorite bundle in the new catalog? Let us know in the comments below. We would love to hear!
Happy Stamping,
Katrina

June 25, 2016

A Little Thank You with a Lot of Glitz

Hi there! I couldn't wait to share this card with you! It is just so glitzy! It packs a punch with all that glitter!

I started with a card base of Whisper White cut 5 1/2" x 8 1/2" scored at 4 1/4". I then stamped the Whisper White piece (5 1/5" x 4") with the flower image from the Hostess set, Gift of Love. I then masked the image using liquid Frisket (you can find this in any craft store) and then stamped the Watercolor Wash stamp in So Saffron ink over the masked flower. Then, I removed the mask by rubbing my finger over it and it peeled right off. I then stamped the inner floral image (two-step stamp) in Watermelon Wonder and the leaves in Emerald Envy. I then wiped the panel with my embossing buddy and stamped the "thank you" sentiment in Versamark ink and heat embossed it in gold embossing powder. I then took some liquid glue and added it to a small cup and diluted it with water so that it would be easy to spatter with my paint brush. I then spattered my card front with the water/glue mixture and poured gold glitter over the entire image and flicked off the excess. I stuck nicely to the glue splatters and created a really pretty glitz to the card. I then adhered the entire panel to the card base using Stampin' Dimensionals. And that's it. A beautiful card to say "thank you" from the bottom of my heart.
Have a great day and Happy Stamping!
Katrina
 

June 23, 2016

Painter's Pallet: A Work of Art

Hello there! Thanks for stopping by to have a look around. Today, I have another very quick and simple card to share with you. I began with a card base of Basic Black cut 4 1/4" x 11 scored at 5 1/2". I then cut a piece of designer paper from the Playful Pallet DSP stack (black and white polka dot) 4" x 3 1/4" and a second piece from the same stack (black and white hash) 4" x 2" and adhered them to the card base. I then took a piece of Whisper White and stamped the painter's easel image in Sweet Sugarplum and the sentiment in the same color in the center of the easel. I then cut the image out using the coordinating Layering Square Framelit (measures approximately 3" square) and adhered that over the card base where the 2 designer papers meet. That's it! Done, and it's really cute!

What do you think? Leave me a comment below and let me know. And remember, you can order any of the products you see here by visiting my on-line store or by clicking the links in the product description below. But be sure to try this card out, it's a winner!
Happy Stamping,
Katrina

June 21, 2016

A Simple Way to Let Them Know You Care!


Hi there! I hope you’re week has had a great start. Today, I want to share a super simple card with you that packs a lot of adorable punch. What makes this card so simple is that it uses 1 stamp set, hostess set, Time of Year, 1 piece of cardstock cut 5 ½” x 8 ½” scored at 4 ¼” (Whisper White) and 3 ink pads, Memento Tuxedo Black, Flirty Flamingo and So Saffron. A few rhinestones later and you have a pop of WOW!
 

I began by stamping the “Thinking of you” slightly off center toward the left of the card followed by the “always” banner in Flirty Flamingo. I then added the flowers from the stamp set in So Saffron and Flirty Flamingo. As a final touch, I added a rhinestone to the center of the flowers. And that was it. Fast, simple and oh so pretty.

What do you think? Leave a comment below and let me know. You can obtain all of the supplies here by visiting my on-line store. The Hostess set, Time of Year, can only be obtained by hosting a qualifying party or placing an order of at least $150 to earn Hostess benefits.  If you have any questions or are interested in hosting a party either in person or virtually via Facebook, please let me know. I would love to help you earn this great stamp set.

Happy Stamping,
Katrina

01 09 10 Code line 7 9 is for loading jQuery library. Remove this line if you’ve already loaded it somewhere else in your blog. Hint: If your blog has an image slider, carousel or something with fading effect running, chances are it is powered by jQuery. If this widget doesn’t work, the first thing you want to do is comment out or remove this line. To use your own button, replace the URL in line 3 with the direct link URL to the image. Make sure to keep the quotes. To reposition the button, replace