Showing posts with label fun fold card. Show all posts

November 8, 2022

Fun Folds featuring Fitting Florets Collection

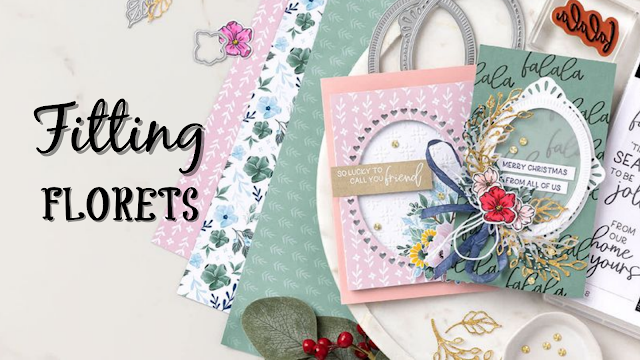
Fitting Florets Header


Hey friends 
I know this is my second post for the day, but I'm trying to play catch up this week, so watch for one more tomorrow to bring me up to day, and the final card on Friday.

This whole week I am focusing on the beautiful Fitting Floret's Collection by Stampin' Up! I LOVE this collection of product. But the thing is, you need to act fairly fast to get the additional stamp set and the gorgeous DSP. Those are only available for a limited time only. 

So today's card is a fun fold I found and wanted to try. This one is SO Cool. 
Fitting Florets funfold
So, for this card...I got a little over zealous during my FB Live and trimmed my card- totally messing up the sizing...So, I'm going to give you all the measurements HERE! So for those of you watching, my apologies, but follow these directions.

Night of Navy Card panel 4-1/4" x 5-1/2"; large enough scrap to die cut Oval shape 
Basic White 4-1/8" x 11" Scored at 2-3/4" turn to the other end and score at 2-7/8" and scrap for stamping
Balmy Blue large enough to cut Oval frame
Fitting Florets DSP cut 2-1/2" x 4" and 2-3/4" x 4"

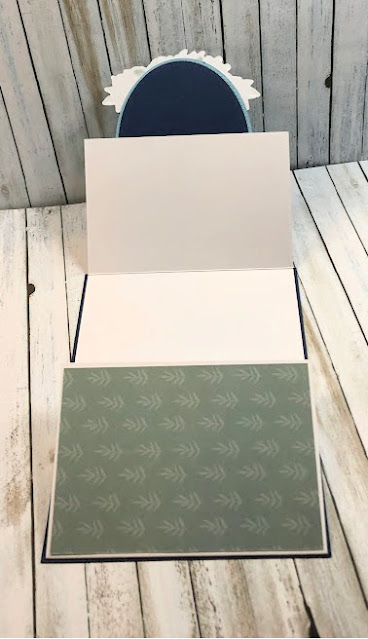
inside funfold
And that's all there is to it. Really not a difficult fun fold as long as  you stick to the plan and don't try to change things up without thinking the WHOLE thing through lol. I guess this falls under the, "do as I say, not as I do" category lol.

Anyhoo, I hope you'll give it a try. I would love to see your results. Be sure to post them over in the VIP for all to see and ooh and aah...it's a thing over there.

Happy Stamping!


Product List

July 15, 2019

Twisted Gate Fold Featuring the Vibrant Vases

Hello and Happy Monday my friends! I'm so excited to have you stop by to see today's project which was also featured last night during my Facebook Live. If you didn't catch it, no problem, there's always replay. But, if you ever want to catch me live, stop by my Facebook page on Sunday evenings at 7 PM ET. We have lots of fun! Anyhoo, this card is so much fun to make and receive! It's a twisted gate fold and it is featuring my product pick for this week, Vibrant Vases.
I love how this card came together. It also features some of our shades of purple, including our new InColor, Purple Posy! Although, due to a quality control issue with the ink, this color pairs perfectly with Highland Heather (used here) as well as Gorgeous Grape and I just used my Purple Posy Stampin' Write Marker to stamp inside my flower petals using the huffing technique!

For a list of measurements and supplies, download the PDF below.


Thanks so much for stopping by. I hope you enjoyed today's card and choose to give it a try. And if you do, be sure to share your results with my over on my Facebook page, www.facebook.com/katrinaskreativeheart We love to see what you do!
Happy Stamping,


Product List

July 11, 2019

We'll Walrus Be Friends Flip Card

Hello and Happy Thursday! Thanks so much for stopping by to visit me here! I am back today with a super cute project! This card is completely inspired by Tami White who is currently enjoying the well deserved Stampin' Up! cruise of the Greek Isles. A very dear friend shared Tami's video tutorial with me, and I completely fell in love with this flip card and knew immediately I wanted to try it with this adorable stamp set, We'll Walrus Be Friends! 


For this card, you will need a card base in Pretty Peacock measuring 8 1/2" x 5 1/2" scored and folded at 4 1/4"
A layer of Whisper White cut using the largest rectangle in the Stitched Rectangles collection
A layering piece of the 2019-2021 InColor DSP cut with the second largest rectangle in the Stitched Rectangles collection
A piece of Pretty Peacock cut 6 1/4" x 2" (this will create your pull) scored at 2" and 2 1/4"
A piece of Pretty Peacock cut with the largest square in the Stitched Shapes Collection, a second one cut from the second largest square from the same collection
A piece of Whisper White cut from the second largest and third  largest stitched squares in the Stitched Shapes collection
Scraps to stamp our image and gasp...we will need to fussy cut him!

Using the Classic Label punch, punch out the center from the DSP and set aside. Add the large Whisper White panel to the card front and set aside. Stamp the Walrus in Memento Tuxedo Black ink onto a scrap piece of Whisper White and color him in using the light and dark Smoky Slate Stampin' Blends and fussy cut him out. Next stamp the sentiment onto the largest Whisper White square and adhere to the largest stitched Pretty Peacock square. Then stamp the second sentiment onto the smallest Whisper White stitched square and layer it to the second Pretty Peacock square. 

Now, you will punch the "pull" with the Delightful Tag Topper punch and adhere the smaller set of stitched squares to the the opposite end of the pull (you will notice a "square" at the end created from your score lines. This is where you will attach the panel. Now add some adhesive to the center of the 2 score lines (preferably Tear & Tape) and adhere the left edge of the larger stitched squares to this. Now, thread the pull through the opening created in the DSP and adhere the DSP to the card with Stampin' Dimensionals, making sure to keep the pull free to move. Thread some of the ribbon through the hole in the pull and tie a bow around it using the Whisper White Bakers Twine.
Okay, go ahead, pull and push and pull again.....isn't it a hoot? I just love these guys and I love this flip card.
I hope this inspires you to give it a try. You'll love it, I'm sure. If you enjoyed this card, feel free to join my mailing list to receive tutorials such as this directly to your inbox each week. You can subscribe right here

Happy Stamping,
.


Product List
01 09 10 Code line 7 9 is for loading jQuery library. Remove this line if you’ve already loaded it somewhere else in your blog. Hint: If your blog has an image slider, carousel or something with fading effect running, chances are it is powered by jQuery. If this widget doesn’t work, the first thing you want to do is comment out or remove this line. To use your own button, replace the URL in line 3 with the direct link URL to the image. Make sure to keep the quotes. To reposition the button, replace