Showing posts with label Stampin’ Up! Card Ideas. Show all posts

September 7, 2026

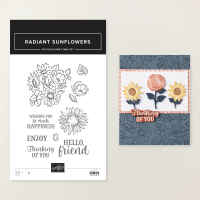
3 Easy Sunflower Cards That Make Designer Series Paper the Star

 Have you ever opened a beautiful pack of Designer Series Paper, admired every pattern…then quietly put it back because choosing where to cut felt like too much pressure?

If your crafting time is limited, the last thing you need is a complicated design or the worry that you might “ruin” the pretty paper. These three easy fall card ideas using the Stampin’ Up! Radiant Sunflower Suite are proof that you do not need hours, dozens of supplies, or a perfect plan. You simply need one pattern you love and an easy layout to get started.

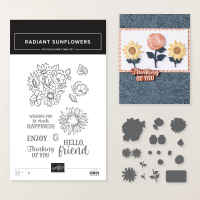
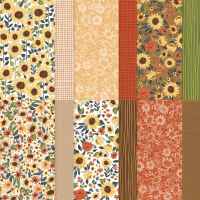
Each card uses the Radiant Fields Designer Series Paper in a different beginner-friendly way. You can copy the layouts exactly or use them as starting points with the paper and stamps already in your craft room.

1. Let Coordinating Paper Do the Design Work

The first card covers the entire front with two coordinating paper patterns: a green stripe and a warm tone-on-tone floral. Placing them side by side instantly creates color, contrast, and movement without adding extra layers.

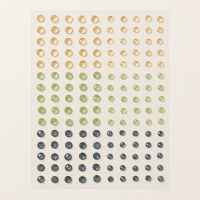
A stamped sunflower, a tiny butterfly, a simple “Enjoy” sentiment, and a few Radiant Gems provide the finishing touches. The flower was colored with Stampin’ Blends, but the coloring does not need to be elaborate. A lighter shade for the base and a darker shade near the center is enough to give the petals dimension.

Try this: Choose one quieter pattern and one busier pattern from the same paper collection. Because the colors already coordinate, you can skip the stressful matching step and trust the paper designer.

Two coordinating patterns create a complete card front with almost no design guesswork.

2. Use One Angled Cut for an Easy Wow

The second card looks impressive, but the design begins with one simple angled cut. A piece of Cajun Craze plaid Designer Series Paper covers part of the white card base, leaving a clean diagonal area for the greeting and floral focal point.

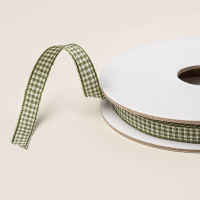
This is a wonderful layout for the days when your creative energy is low. The angle adds interest before you stamp a single thing, while the white space keeps the finished card from feeling busy. The large flower cluster is stamped once, colored quickly, die cut, and added with dimensionals. A length of Mossy Meadow gingham ribbon hides the edge of the paper and pulls the whole card together.

Permission slip: Your angle does not have to match mine. If it lands a little differently, it is not wrong—it is your card. Trim any tiny overhang and keep going.

A single angled panel leaves room for a bold floral image and a friendly greeting.

3. Turn One-Inch Scraps into a Clean Card Layout

Do you save narrow strips of pretty paper because they feel too useful to throw away? This third design gives them a job. Cut three coordinating strips to 1 x 4 inches, snip a small notch into one end of each strip, and arrange them across a Thick Basic White card base.

Add a die-cut sentiment over the lower portion of the banners and finish with a few gems. That is it. The result is clean, cheerful, and easy to reproduce—especially when you need several cards but do not want an assembly line that feels like work.

Make it yours: Change the sentiment and this same layout can become a birthday card, thank-you card, thinking-of-you card, or seasonal greeting. It is also a smart way to use scraps before reaching for a fresh sheet.


Three one-inch banner strips turn coordinating scraps into a polished focal point.


Simple Cards Still Feel Special

A handmade card does not need to be complicated to make someone feel remembered. If you have been waiting for more time, more confidence, or a perfectly organized craft room, let this be your reminder: you can begin with one card, one easy layout, and the supplies you already have.

Which of these Radiant Sunflower cards would you make first—the full paper background, the angled panel, or the three-banner design? Leave me a comment and tell me your favorite. Save this post for the next time you need an easy fall card idea, and use the free tutorial to recreate all three at your own pace.

Product List


August 31, 2026

3 Easy Fall Cards with the Painted Patch Suite

 Have you ever finally found a little time to craft, sat down at your table…and then had no idea where to begin? You pull out pretty paper, stamps, ink, and embellishments, but suddenly every choice feels like one choice too many. If that sounds familiar, you are not alone—and you do not need a complicated design to make a card that feels special.

For this week’s Stampin’ Sundays, I created three easy fall cards with the Stampin’ Up! Painted Patch Suite; available 9/1. Each card started with a simple card sketch, then I used a different beginner-friendly method to create the pumpkins: Stampin’ Blends, decorative masks with blending brushes, and dies that cut images directly from the Designer Series Paper. The result is three layered, polished cards without the pressure of designing everything from scratch.

Start with a Card Sketch, Not a Blank Page

A card sketch is one of my favorite tools when creative overwhelm sneaks in. Think of it as a flexible map: it suggests where to place your paper, focal image, and sentiment, but you decide the colors, products, and personality.

For these cards, I chose three sketches from my Pinterest card-sketch board. I did not follow every element exactly. On the first card, three patterned-paper strips matched the sketch, but I replaced the circle focal point with a cluster of pumpkins. That is the secret to using sketches without making yourself crazy: let the sketch get you started, then make it your own.

Try this: choose one sketch before pulling out supplies. Limit yourself to one stamp set, one pack of patterned paper, and three coordinating colors. Fewer decisions usually mean more time actually creating.

Card 1: Stampin’ Blends add rich color to a playful pumpkin cluster.

Card 1: Relaxing Color with Stampin’ Blends

The “Hello Gourd-geous” card is perfect when coloring helps you slow down and unwind. I stamped the pumpkins in Memento Black ink and colored them with Cajun Craze, Timid Tiger, and Golden Glow Stampin’ Blends. The three vertical strips of Painted Patch Designer Series Paper add interest while keeping the layout easy to repeat.

You do not need advanced coloring skills. Add the darker shade along the pumpkin segments, hash marks, and bottom edge, then fill with the lighter shade. Go back with the dark marker only where you want a little extra depth. It is simple, forgiving, and gives the pumpkins dimension without hours of work.

And please—use the pretty ribbon! I caught myself trying to conserve it during the Live, but hoarding supplies does not make us more creative. That ribbon was purchased to become part of something lovely.

Card 2: Layering masks and blending brushes create color without detailed coloring.

Card 2: Easy Color with Masks and Blending Brushes

If detailed coloring feels intimidating, the thank-you card offers an easier option. The numbered Painted Patch masks guide each layer, so you can build colorful pumpkins with blending brushes and ink.

I used Golden Glow, Timid Tiger, Calypso Coral, and Old Olive. Start your brush on scrap paper, then move onto the mask in a gentle circular motion. This prevents a heavy blob of ink at the edge. Align each mask using the same notch and secure the paper so nothing shifts. Once the layers are complete, one coordinating die cuts the whole group.

This technique looks impressive, but the masks do the hard work. It is a wonderful confidence builder when you want a handmade result without worrying about staying inside tiny lines.

Card 3: Die-cut pumpkins from Designer Series Paper for the fastest focal point.

Card 3: Let the Designer Series Paper Do the Work

Short on time? This “I Hope Your Day Is Fabulous” card is the quickest of the three. The Painted Patch dies coordinate with selected pumpkin images in the Designer Series Paper, so there is no stamping or coloring required. Simply position the die, cut the images, and arrange them on the banner.

The Pool Party background was embossed with the Rustic Check 3D Embossing Folder, adding plenty of texture without complicating the layout. A little linen thread and a few adhesive-backed dots finish the card. This is exactly the kind of design to keep in mind when you need a beautiful card quickly—or when your creative energy is running low.

Choose the Method That Fits Your Day

You do not have to make all three cards or master every technique at once. If you have ten quiet minutes, die-cut pumpkins from patterned paper. If you want a little creative play, try the masks. If coloring helps you decompress, pull out your Stampin’ Blends.

Crafting is supposed to be your break—not another place where you feel behind or not good enough. Start with the supplies you already have, borrow one of these layouts, and give yourself permission to enjoy the process. Even if you do not own the Painted Patch Suite, you can recreate these ideas with flowers, leaves, Christmas images, or any focal shapes in your stash.

Which method would you try first: coloring, masks, or die-cutting from Designer Series Paper? Leave me a comment and tell me. Be sure to save this post for the next time you need an easy card idea, and grab the full three-card tutorial so you can create right along with me.

09 10 Code line 7 9 is for loading jQuery library. Remove this line if you’ve already loaded it somewhere else in your blog. Hint: If your blog has an image slider, carousel or something with fading effect running, chances are it is powered by jQuery. If this widget doesn’t work, the first thing you want to do is comment out or remove this line. To use your own button, replace the URL in line 3 with the direct link URL to the image. Make sure to keep the quotes. To reposition the button, replace