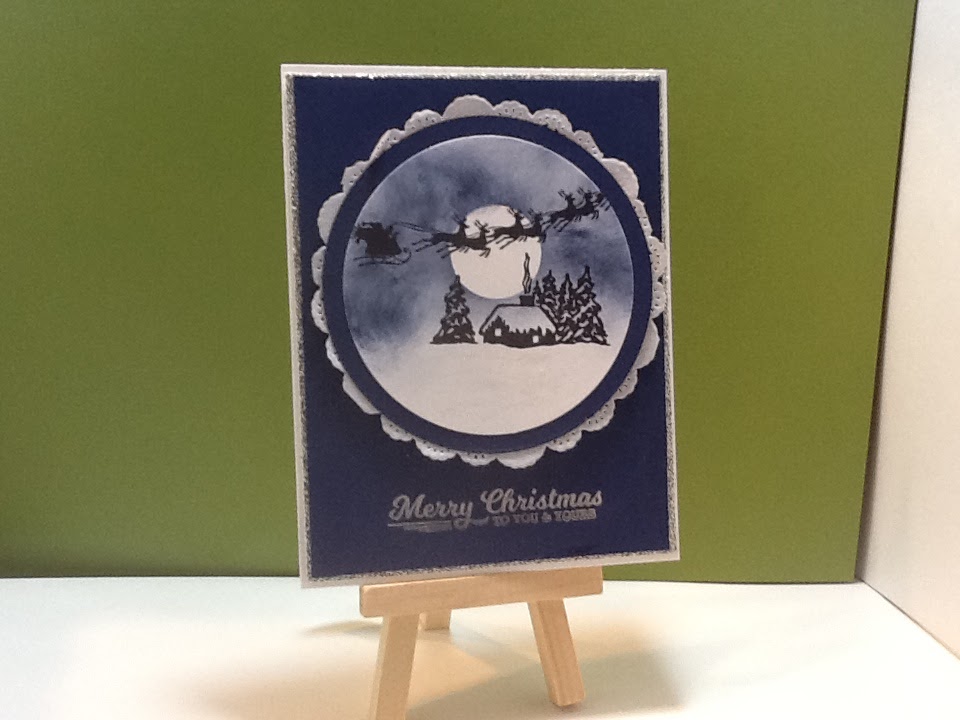
November 10, 2015

Peaceful Pines


There is some truth in that stamp name. You can often find peace and solace walking through the woods, observing Gods amazing creations, and around here, there are lots of pines. I don’t know about you, but I love walking through the woods, of course, my husband and I pretty much live smack dab in the middle of the woods here in Upstate NY, so I guess I should love it.

Anyway, I created this card using the Peaceful Pines stamp set and coordinating framelits. It’s pretty simple and I really like how it came out.


All supplies used can be found below.
Instructions: I started with a Whisper White card base cut at 5 ½”x8 ½” scored at 4 ¼” I stamped the detailed pine tree onto a scrap piece of Whisper White with the Mossy Meadow ink and cut it using the coordinating framelit. I also cut a scrap piece of Smokey Slate using the same framelit. I then cut a scrap piece of Real Red cardstock using the Circle framelits (the 4th one counting from the outside in) and I cut a piece of DSP from the Merry Moments paper stack (found in the holiday catalog) to 2”x5 ¼”

Once I had all of my pieces cut and stamped, I adhered the DSP using snail adhesive ( I ran out of my favorite Fast Fuse – I can’t wait for my order to arrive!) I then layered the Real Red circle a little to the right of center again using Snail adhesive. I then cut a Tea Lace Doily in half, then folded that in half and tucked it in behind the Real Red circle. I placed the Smokey Slate tree onto the Real Red circle, also with Snail and the stamped tree I placed a little lower than the other and popped that up on Dimentionals. I stamped the verse, also from the Peaceful Pines stamp set in the lower right hand corner of the card with the Mossy Meadow Ink.

Thanks so much for stopping by and taking a look. Please leave a comment below and let me know what you think.

Have a great day and Happy Stamping!
 
Built for Free Using: My Stampin Blog


November 7, 2015

A Cozy Christmas


Well, I hope wherever you are, you have been experiencing the beautiful fall weather that we have been enjoying here in the Northeast. Unusually warm temperatures and lots of sun…not normal this time of year in these parts but I sure will take it and be grateful; it won’t be long and old man winter will be here putting us into the deep freeze. Brrrr, I shutter at the thought, however, A Cozy Christmas does warm me up. I love this stamp set and couldn’t wait to use it.


Here is my take on this beautiful stamp set and how I did it:

I cut an 8 ½”x11” Whisper White CS at 5 ½”x8 ½” and scored at 4 ¼”

I cut the 12”x12” Glitter paper to 5 ¼”x4”

Night of Navy panel is 5”x3 ¾”

Using the Circle Framelits, counting from the outside in, I cut the Night of Navy with the 3rd framelit and the Whisper White with the 4th framelit.

I stamped the cabin from the A Cozy Christmas stamp set onto the Whisper White circle using Basic Black Archival Ink. I punched a 1” circle from a sticky note to create a mask for the moon and placed it over the smoke stack created by the cabin stamp; I then sponged Night of Navy ink to the “sky” area around the cabin. I stamped the flying Santa Sleigh from the stamp set using the Basic Black Archival Ink, added glue from the glue pen to the snow covered roof, the ground and the snow covered trees and sprinkled with the dazzling diamonds.

I adhered the Night of Navy panel to the Glitter paper using Tombow Mono-adhesive (green glue) and adhered them onto the Whisper White card base using the same glue,

Once the Dazzling Diamonds glitter was dry, I adhered the stamped image to the Night of Navy circle with Snail adhesive, and then adhered them to a paper doily with the same. I then popped them up with Stampin’ Dimentionals and adhered them to the card front.

The sentiment that I used comes from the stamp set, To You and Yours Too, also from the holiday catalog. The ink that I used is retired, it is the Silver Metallic Ink from last year’s holiday catalog, however, it is easily found at your local craft stores. That’s it, very simple and yet elegant with all the sparkle. So, what do you think? Leave me a comment below and let me know what your thoughts.

Thanks again for stopping by my little corner of the web and I wish you all a wonderful day.

Happy Stamping!
Built for Free Using: My Stampin Blog


November 3, 2015

Stamping on Tile


I shared a photo of some of the tiles I had stamped on Facebook, but wanted to share them with you here with a mini tutorial on how I made them. These make great little Christmas gifts and are rather inexpensive to make.
 

I started by visiting my local Lowes Home Improvement store to purchase the tile. What I found and worked well for me was a box of 9 Tumbled Granite tiles. Some of the tiles were as smooth as can be and were easily stamped directly onto the tile, while others were lumpy and bumpy with little moon craters throughout. Those lumpy bumpy ones, I couldn’t stamp directly onto them so to get around that, I stamped my pattern onto cardstock that I cut using the square framelits and my Big Shot. I then colored the images and adhered them to the tiles using ModPog after cleaning the tiles with a soft cloth to remove any loose dust. The ModPog worked beautifully. It not only adhered the cardstock to the tile, but it also provided a protective coating so that the tiles can be used as  coasters and holds up to any moisture that may occur due to condensation from cold drinks. In order to use ModPog, you will need to stamp your image using Momento Tuxedo black ink and color your images with an alcohol based marker such as Copic or Spectrum Noir. I will be honest, I used the discontinued Stampin’ Up! Blendabilities, but any alcohol marker will work; then I added a heavy coat of the ModPog. If you try to use a water-based marker or ink, it will run when you apply the ModPog…..don’t ask how I know this!
 

Now, for the smooth tiles, I just wiped them free of loose dust and used Stazon Jet Black ink to stamp the image directly onto the tile. I allowed the ink to dry for a bit and set it with my heat gun. I then colored in some of the images with my Stampin’ Write markers. These are a water-based ink marker, however, I sealed these with an acrylic spray sealer and there was no running of the color so it worked out fine.

I hope you enjoyed this and give it a try for yourself. Please leave me any comments below and let me know what you think.  In the meantime, happy stamping!
Built for Free Using: My Stampin Blog


October 31, 2015

A Cool Tip for Cleaning your Stampin’ Scrub


Well, as I mentioned to you in my last post, I have a cool little tip for you on cleaning your Stampin’ Scrub and getting it back in business lick-ity split! Yep, you heard me…lick-ity split, pronto, right away!

First, I pop the fuzzy squares from the plastic case and wash them under warm running water and add a little dab of Dawn dish liquid and rinse until the water runs clear. Then, using the palm of my hand, I push as much water down and out of the fuzz as I can.
 
Now, here is the part that gets you back to creating right away…..using your carpet shampooer, the furniture attachment? Yeah, the piece attached to the hose? Suck the remaining water out of your fuzzy squares until dry! That’s it! Easy, fast and dry! You can’t beat that! Now, pop those fuzzy squares back into the case and you’re back in business.
Built for Free Using: My Stampin Blog


October 27, 2015

My Top 5 Most Important Stamping Tools


I don’t know about you, but I have 5 tools that I consider my must haves when stamping beside the obvious paper, ink and stamps/blocks.

The first tool on my must have list, is my Stampin’ Trimmer! This trimmer is by far the best paper trimmer I have used, and trust me, I have used several. A few years ago, when I was first re-discovering my love of paper crafting, I went out and purchased a rather in-expensive rotary cutter. Ugh, the saying, “you get what you pay for”…I think it came from someone who bought this very rotary cutter….I couldn’t cut a straight line to save my life! It was awful! So, off to one of the big box office supply stores I went. There I found myself a rather pricy guillotine paper trimmer; that should work! Until I got it home that is….Immediately, when I pulled it out of the box, I could see that the swing arm was bowed out and sure enough, I couldn’t cut a straight line from that either! Finally, I decided to purchase the Stampin’ Trimmer. I was so excited when it arrived, but also prepared myself to be known forever to make crooked cards. I pulled it out of the box. It looked good. So, I pulled out an 8 ½” x 11” piece of cardstock and made my first cut at the 5 ½” mark, and there it was, a perfectly cut card base! It was beyond belief so I had to check it again….and sure enough, my eyes were NOT playing tricks on me! Wahoo! I found my new best friend in the craft room!

The second “must have” on my list is the grid paper from Stampin’ Up! This is the perfect desk protector and allows me to ensure perfectly straight placement of sentiments, lines etc. The grid allows me to line everything up to ensure straight even designs. Remember…I can’t eyeball a straight line…see aforementioned love of the Stampin’ Trimmer!

My 3rd “must have” in the craft room is my piercing tool. This little gem looks like it’s uses are pretty limited, however, it’s not just for paper piercing, mine gets used EVERY DAY, every crafting session. I use it to pick up rhinestones, pearls, candy dots, enamel dots, glue dots that need to be placed precisely. I use it to hold down corners that need a little extra glue drying time. I use it to hold down something I may be embossing with my heat tool to prevent burnt fingers…or should I say charcoal fingernails…that’s another story!

The 4th most important item in my craft room is my Stampin’ Scrub.  This is the best stamp scrubber I have used and it’s soft and gentle on your stamps while many out on the market tend to be rough and scratch up your stamps. And personally, I don’t think they would be very good for your lovely photopolymer stamps. In spite of being soft and gentle on your stamps, it does a great job cleaning them with the Stampin’ Mist. These 2 products together are dynamite! And when the scrubber gets too dirty to do the best job that it can do, it is easy peasy to clean…just pop out the fuzzy pads, run them under water, let them dry and you’re back in business!  Don’t want to wait for them to dry 24 hours? Check back in a couple of days and I will share my little “trick” with you! You’re going to LOVE it!

And finally, the 5th most important tool in my craft room is my paper snips! These little pointy scissors are an absolute must have in your stamping arsenal. They allow you to “fussy cut” with precision. They are comfortable in your hand, are great for trimming and cut ribbon like butter!

So, there you have it, my top 5 must haves in the craft room. What are your must haves in your stamping arsenal?


Built for Free Using: My Stampin Blog


October 20, 2015

All Stamps on Sale for 15% Off

SnS From the Heart
 
Hey there, I just wanted to let you all know that Stampin' Up! has put ALL stamp sets on sale for 15% off! What a great deal that is! So, if you have been eyeing that favorite stamp set from either the annual catalog or the holiday catalog, now is the time to get it. This sale is only until Friday so be sure to not miss out. Just click the "shop now" button above and pick out your favorite sets!
While I am here, I have to tell you, I recently purchased the Lockdown Punch Holder from Stamp n Storage....OMG! I am so in love with this product. I can now easily grab the punch I need without toppling over all the other punches and not pinch my fingers because they are all packed into a basket. This is furniture quality and looks beautiful in my craft room. I have now placed an order for the marker storage and hope to soon get the ribbon holder and the combo ink pad holder...oh honey....I know what I want for Christmas!!!! I hope he can hear me! But if you're on the fence about ordering, don't hesitate. This company is fantastic and I guarantee you won't be disappointed!


October 11, 2015

A Beautiful Dove of Peace

Todays card was cased from the catalog. Sometimes, the Stampin' Up! Catalog and Idea book is the perfect place to get ideas from, and this is a perfect example of that.
This card uses dry embossing, fussy cutting, die cutting and a little bit of Blender Pen coloring and was a great deal of fun to put together. So, when you feel like getting crafty with your paper and ink, but aren't quite sure where to begin, begin with your Stampin' Up! catalogs. They're a wealth of ideas all in one place! :-)

Built for Free Using: My Stampin Blog

October 8, 2015

Haunt Ya Later!

Wow, fall has landed in CNY! The air is crisp and the trees are in full color. I have to say, I love the colors of Fall, the reds, the yellows, golds and oranges..all so pretty. I also love to see how others decorate for the season. Some go for the cutesy scarecrow's, while others lean more toward the haunted zombie cemetery lol, all of which is fun to see. I, myself lean toward the cutesy scarecrow look, but today's card comes from the Haunt ya Later stamp set from Stampin' Up! I love this set. It's so dang cute.. Feel free to let me know your thoughts!
Happy Fall Ya'll!

September 29, 2015

A Little More Christmas for Fall

Can you believe another month is coming to a close? I sure can’t. It still seems as though the snow has just left us and here we are preparing for more. I personally find it mind blowing. I do love fall and I adore Christmas but I could really do without winter. Hubby has been working hard over the last several weeks to get our wood in to keep us warm. He’s such a good guy. He makes sure Tucky and I are warm and toasty all winter long. Unfortunately, burning wood is messy and I don’t like messy. I run around behind him with the vacuum cleaner quite often but, I do like being warm so I try not to complain too much (wink).
Now, on to the card! I cased this one direct from the holiday catalog. I hope you like it. Please share with me your thoughts, and if you would like to see something in particular, please let me know.


Built for Free Using: My Stampin Blog

September 20, 2015

Getting Ready for Christmas

Well I've begun to work on my Christmas cards. Stampin' Up! has some fantastic Christmas sets in this years holiday catalog. So many to chose from, you can chose between adorable and just plain beautiful. Today's card that I'm going to share with you is in the beautiful category. What do you think?

If you would like to make this card, please visit my on-line store to pick up your supplies. The supplies used on this card are below.
Built for Free Using: My Stampin Blog

September 7, 2015

Don't Miss Out on the New Goodies!

Hey there, the one finger wonder here...yes, I'm still typing with one finger. The lovely pink brace has made my finger so big that I hit 2-3 keys at a time; hence, typing with one finger...yuk! Anyway, I wanted to let you know that the new holiday catalog went live on 9/1 and it is awesome!!!! I have to say, Stampin' Up! out did themselves on this one! I love everything in this catalog and I mean EVERYTHING!!! Take a look at this sample I put together. What do you think?

I added a battery operated tea light behind the flame to create a flickering effect. This card was a lot of fun to make and I combined a few stamp sets and framelits to create it.
Thanks for looking and have a great day!

August 26, 2015

Update

Well, went to see the hand specialist and got a fancy schmantsy splint that they custom made for my finger

Yes, I still have sausages for finger but I think I sport the pink splint pretty well, don't you? The pain is actually improving as long as I can stop bumping it, Why is that? Have you noticed that as soon as you injure a digit, whether toe or finger, rest assured you will bump it every chance you get. If anyone knows the answer, I sure would like to know! Anyway, I am hoping to be able to tolerate opening and closing ink pads by this weekend which means I will have some stuff to share by then. In the meantime, stay tuned for some sneak peaks of the upcoming Holiday Catty! If you would like one, just message me through the link above, and I will get one out to you ASAP!
Happy Stamping!

August 20, 2015

We Must Interrupt All This Stamping Fun.........

Hey, I've had to take a break from all this stamping fun due to having a bad cold that has caused me to cough myself into a pounding headache and in addition, I managed to break a finger. Yep, sure did. And a bang up job I did too. My parents always taught me, "if you're going to do it, you better do it right". Somehow,  I don't believe they meant it about breaking bones! This is really making typing difficult...I'm not a good one handed wonder! And as for stamping, the pressure incurred by my hand and finger attempting to open and close t.he stamp pads is extremely painful. Hopefully, that wont last long, but until then, I will be a little silent. Its the middle finger, first joint that is broke and no, those rings are NOT coming off....ugh....that would REALLY HURT.


August 13, 2015

Project Life "Remember This" as a Wedding Card?

Yes, today I have a wedding card to share! I mixed the Wild Flowers stamp set with the PL Remember This stamp set a little Blushing Bride and viola! Also, a little sneak peak of a punch coming in September with the Holiday Catalog! Wait until you see this! It will be a MUST have on your wish list! I created a mask using a scrap piece of Whisper White cardstock and the oval framelits and then I sponged the Blushing Bride ink onto the center of the piece of Whisper White. I then stamped the image using two step stamping. I punched the corners added the ribbon slide and ribbon. I then stamped the verses and I really like this card a lot.

This is the final project in the PL Remember This series. Now pull this set off your shelf and give it a work out and see what great creations you come up with! Join me next week to see which stamp set we decide to use and see what we can come up with. In the meantime, Happy Stamping!

Built for Free Using: My Stampin Blog

August 11, 2015

Project Life "Remember This" - It's not just for Project Life

Here is a cute project I came up with to use this great stamp set...it does involve a photo, however, it has nothing to do with PL or scrapbooking traditionally either. Take a look:
I stamped the words "picture perfect" from the stamp set directly to the photo and placed it in the frame after I stamped the frame with the Butterfly Basics set using the fern image with Mossy Meadow ink. I also added a punched butterfly from the Papillion Potpourri stamp set in Lost Lagoon and cut the larges butterfly from the Butterfly thinlits and attached them with glue dots.

I hope this inspires you to go outside the box. There are so many ways that you can use your stamps and ink. Just open your mind and don't be afraid to try something. You never know, you just may come up with the best idea ever,

Happy Stamping!

Built for Free Using: My Stampin Blog
01 09 10 Code line 7 9 is for loading jQuery library. Remove this line if you’ve already loaded it somewhere else in your blog. Hint: If your blog has an image slider, carousel or something with fading effect running, chances are it is powered by jQuery. If this widget doesn’t work, the first thing you want to do is comment out or remove this line. To use your own button, replace the URL in line 3 with the direct link URL to the image. Make sure to keep the quotes. To reposition the button, replace